Triggers
Table of Contents
- Intro
- Description of the UI
- Creating single triggers
- Creating new scheduled triggers
- Creating Queue triggers
- Editing an existing trigger
Intro
The ‘Triggers’ tab is where the running schedule for the automation processes is defined.
There are 3 different kinds of triggers:
- Scheduled triggers: Run the process at a given interval defined using cron expressions.
- Queue triggers: Run the process when a database queue reaches a minimum number of elements.
- Single triggers: Run the process once at a given date and time.
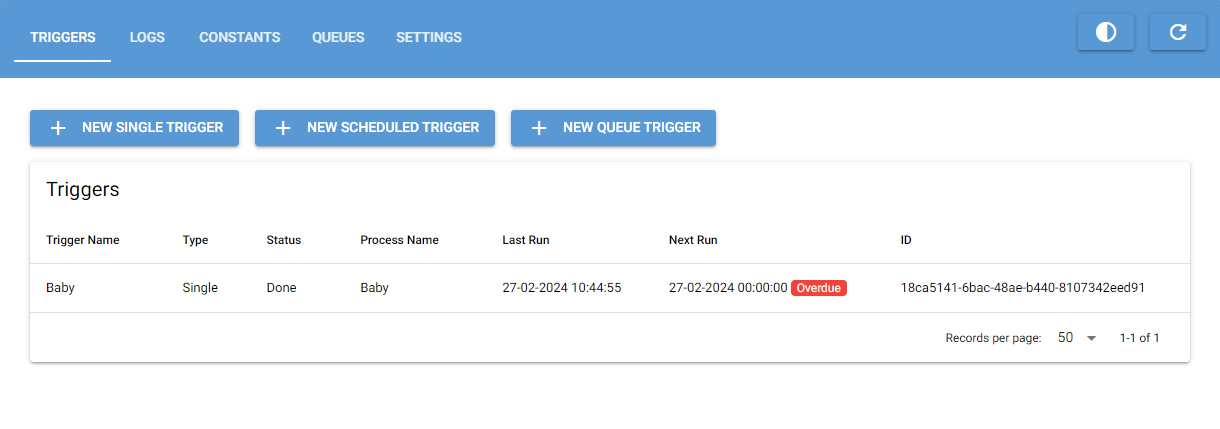
Description of the UI
The three New trigger buttons are used to create new triggers.
The table shows all triggers currently in the database. Here you can see the name of the trigger and process, the type of trigger, the last time the trigger was activated and when it’s scheduled to run again (if applicaple). If a trigger’s next run time is in the past a red badge will appear notifying that the trigger is overdue.
To see more details about a trigger you can click on it in the table.
Creating single triggers
When creating a new single trigger the following pop-up is shown:
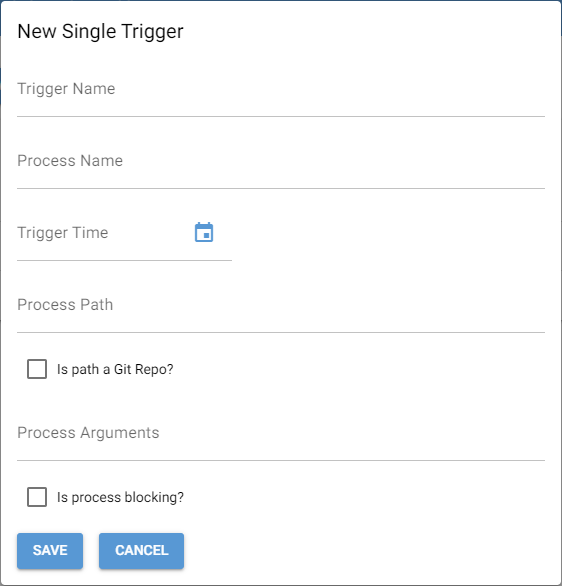
Trigger Name: The name of the trigger to be shown in the trigger table.
Process Name: The name of the process. This will be shown in the triggers tab as well as any logs created by the process.
Trigger Time: The time and date to trigger the process.
Process path: The absolute path to the process on the computer or a URL to the git repo hosting the process.
Is path a git repo?: Toggle this on if the process path given is a URL to a git repo.
Arguments: Arguments to be passed to the process at runtime. This value is passed as a raw string. It’s recommended using a json string for more complex arguments.
Is process blocking?: If this is off the process is allowed to run parallel to other non-blocking processes. If it’s on the process will always run alone on the worker machine.
Creating new scheduled triggers
When creating a new scheduled trigger the following pop-up is shown:
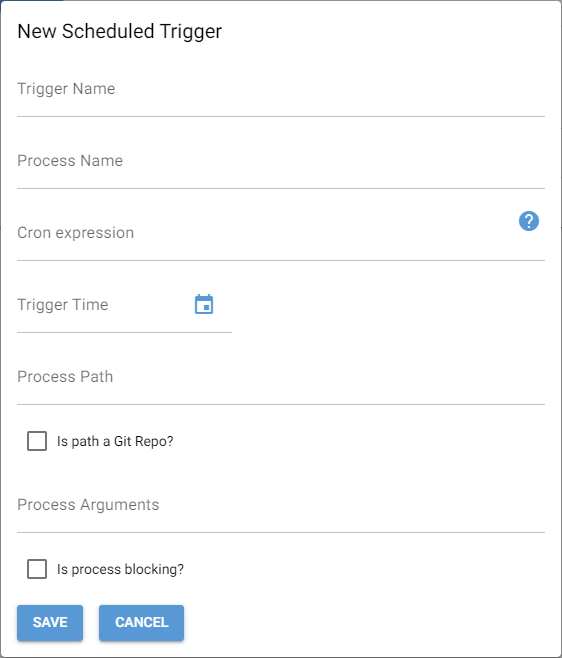
Trigger name: The name of the trigger to be shown in the trigger table.
Process name: The name of the process. This will be shown in the triggers tab as well as any logs created by the process.
Cron expression: The run interval of the process described as a cron expression. Use the help link (blue question mark) if you don’t know how to write cron expressions.
Trigger time: The next time the trigger should run. This is automatically filled to be the next time the cron expression is fulfilled.
Process path: The absolute path to the process on the computer or a URL to the git repo hosting the process.
Is path a git repo?: Toggle this on if the process path given is a URL to a git repo.
Arguments: Arguments to be passed to the process at runtime. This value is passed as a raw string. It’s recommended using a json string for more complex arguments.
Is process blocking?: If this is off the process is allowed to run parallel to other non-blocking processes. If it’s on the process will always run alone on the worker machine.
Creating Queue triggers
When creating a new queue trigger the following pop-up is shown:
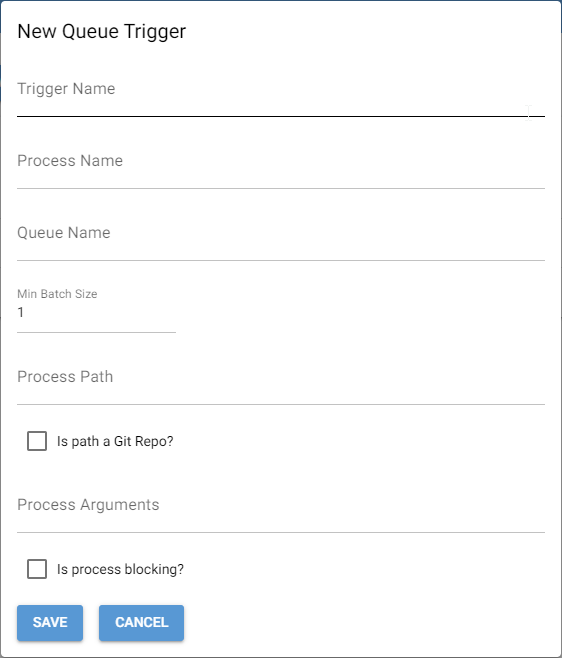
Trigger Name: The name of the trigger to be shown in the trigger table.
Process Name: The name of the process. This will be shown in the triggers tab as well as any logs created by the process.
Queue Name: The name of the queue associated with this trigger.
Min batch size: The minimum number of elements in the queue before triggering the process.
Process path: The absolute path to the process on the computer or a URL to the git repo hosting the process.
Is path a git repo?: Toggle this on if the process path given is a URL to a git repo.
Arguments: Arguments to be passed to the process at runtime. This value is passed as a raw string. It’s recommended using a json string for more complex arguments.
Is process blocking?: If this is off the process is allowed to run parallel to other non-blocking processes. If it’s on the process will always run alone on the worker machine.
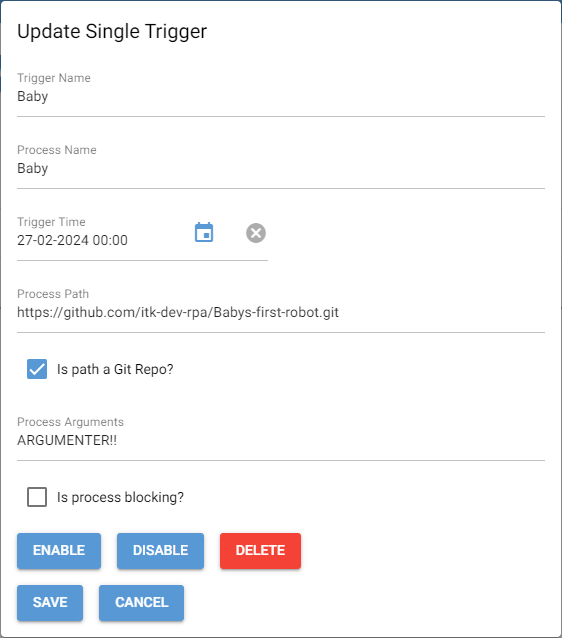
Editing an existing trigger
To edit an existing trigger simply click it in the tables. This will open a pop-up to edit the trigger.
Here it’s also possible to enable/disable a trigger. When a trigger is disabled its status is set to “Paused” and it will not run before being enabled again. When a trigger’s status is either “Paused” or “Failed” it needs to be enabled before it will run again which will set its status to “Idle” indicating it’s waiting for its trigger event.
You can also delete a trigger. This will permanently remove the trigger from the database and cannot be undone.